How to Drive Qualified Conversions With Non-Branded Search Traffic
-
DESCRIPTION
Capture existing demand of prospects searching high intent terms on Google and drive net new acquisition with this playbook.
-
CHANNEL
Google Ads
-
OBJECTIVE
Pipeline Generation
Hey I’m Silvio Perez, Head of Product Innovation at Metadata.
Google has more than 8.5B searches per day!
With people looking for answers to their questions.
This real-time intent is what makes Google Ads so attractive and expensive for B2B marketers.
If you’re looking to drive net new acquisition and reach new potential customers then Non-Brand search is a staple playbook you’ll want to consider running.
Is Non Branded Search right for you?
- You’ll want to confirm your CPC prices are reasonable to make your economics work. You can do so with the Google Ads Keyword Planner or in Metadata via Keyword Library.
- You’ll want to confirm you have enough search volume for your target keywords (ideally > 500 searches/month) to make your efforts worthwhile. You can do so with the Google Ads Keyword Planner or in Metadata via Keyword Library.
If Non Branded search makes sense after reviewing your estimated CPC prices and search volume.
Here’s a quick rundown on how this works.
How it works
- Create a list of high intent non brand keywords to target such as:
- {core keyword} + software
- {core keyword} + platform
- {core keyword} + provider
- {core keyword} + solutions
- {core keyword} + tools
- Write ad copy that highlights your brand and connects the searchers pain point to your value proposition.
- Direct prospects to a dedicated conversion page such as requesting a demo, starting a free trial, and viewing an on-demand product tour.
The Playbook
Research and build your non-brand keyword list.
Head over to Library → Google Assets → Positive Keywords → Add New Keywords
Brainstorm your desired non-branded keywords you’d like to target.
When brainstorming keywords ask yourself:
- What would my ideal customer search in Google to find a product/solution like mine?
Common examples include:
- {core keyword} + software
- {core keyword} + platform
- {core keyword} + provider
- {core keyword} + solutions
- {core keyword} + tools
Metadata example:
- Account based marketing software
- Account based marketing provider
- Account based marketing platform
- Account based marketing solutions
- Acocunt based marketing tools
BONUS TIP: if you’re really struggling with keyword ideas you could just start broader with the core keyword and build out your keyword list overtime with the search terms report.
Once you have your list of keywords confirm you have enough search volume and your CPC prices are reasonable using the Metadata Keyword Library.
- Keywords with > 500 searches/month are ideal as less volume will struggle to deliver and scale.
- If you have keywords with < 500 searches/month but are HIGH value to your business then consider bidding on them anyways, just know you’re going to be limited on scale.
- “Reasonable” CPC prices will differ company-to-company. When researching keywords with the Keyword Library focus on the ‘Higher Page Bid’ estimate.
- Just know that these numbers are estimates and usually wrong. You won’t know you real costs until you launch your campaign.

Create your paid search budget group (if applicable)
Head over to Campaigns → Budget Groups → Add New Group
How you set your group is completely optional based on your budget and goals.
If you want to guarantee that a certain amount of spend is allocated towards a specific channel then create its own dedicated group as outlined below.
For example:
- Group Name = Paid Search
- Goal = Lead Generation

If you don’t mind your budget is shared across different channels that support the same goal create one group as outlined below.
For example:
- Group Name = Demo Request
- Goal = Lead Generation

If you already have a group created that you’d like to use then skip this step.
Build your landing page offer you’re driving traffic towards.
Head over to Library → Offers → Add New Offer → Landing Page for Lead Generation
Enter your Landing Page URL (required) and Thank You Page URL (optional).
If you don’t have a thank you page, no worries! Just enter your landing page URL again.
(You’ll still be able to capture leads in Metadata without a Thank You Page URL).
Select ‘Retrieve Form Fields’ and map your fields accordingly.
IMPORTANT: email is the only required field but if mapping is incorrect can cause lead capture issues. For more information on creating landing page offers read this article.
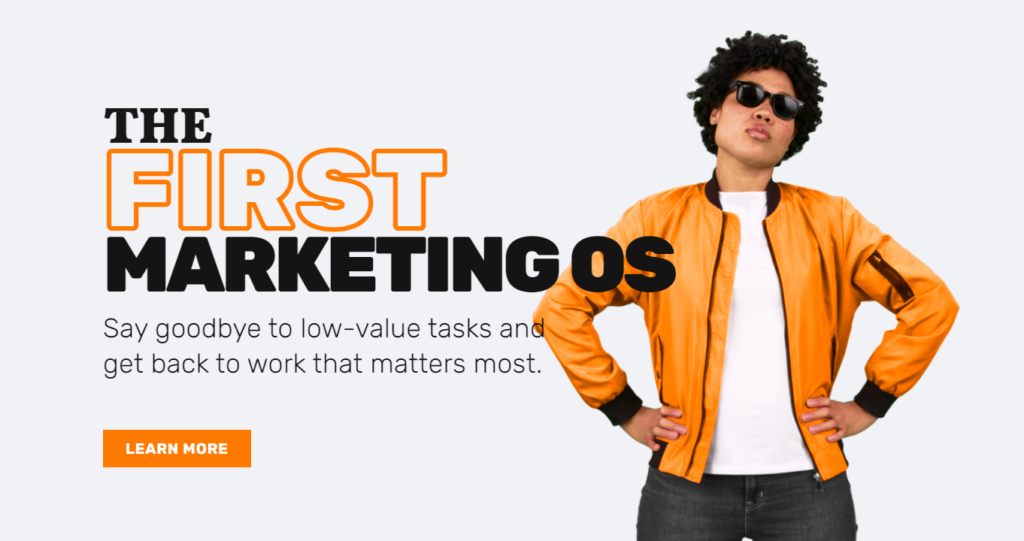
Here’s an example landing page for Metadata:
https://metadata.io/marketing-os/
Write your non-brand search ad copy with responsive search ads.
Head over to Library → Ads → Add New Ad → Google Ads
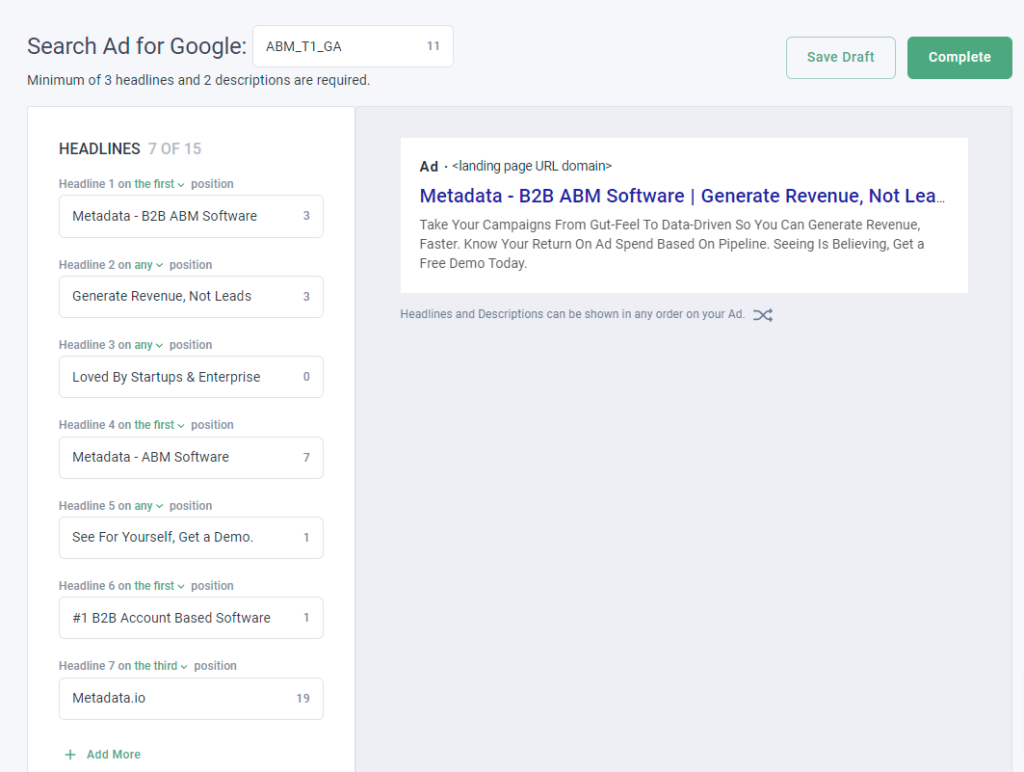
Enter your ad copy for minimum 3 headlines and 2 descriptions.
We recommend the following:
- Pin your brand name in position 1 for awareness.
- Highlight your unique differentiation in position 2.
- Metadata example = Generate Revenue, Not Leads
- Title case the beginning of each letter to help improve CTR, example:
- Title case = Metadata Is a Marketing Operating System Used By B2B Marketers
- Lower case = Metadata is a marketing operating system used by B2B marketers
- Pin and leverage as many positions possible to allow Google to rotate your ad copy but also control legibility with pins (if your ad isn’t readable, no one will click).
- 1 RSA (responsive search ad) should suffice as it’s the equivalent of 5 expanded text ads when leveraging all 15 headlines and 4 descriptions.
Here’s an example RSA for Metadata:
Setup and launch your non-brand search campaigns!
Head over to Campaigns → Add New Campaign → Lead Generation
(You can do brand awareness, but we recommend Lead Generation for search campaigns).
Campaign Name:
Enter your campaign name, here’s a simple naming convention you can use:
- Region | Targeting | Channel | Match Type | Offer
- For example: NA | ABM | Google Ads | Phrase | Demo
Campaign Ingredients (Keywords/Ads/Offers):
You’ll want to have a strong message match with relevant keywords, ads, and landing page to yield higher quality scores.
- Enable Google Ads and select ‘Include Keywords’ to add all the relevant keywords you created in Step 1 (also recommend excluding negative keywords).
- Once you’ve added all your keywords select ‘Add Ad’ and choose your relevant brand ad copy for this competitor you created in Step 4.
- Finally once you’ve added all your ads select ‘Add Offer’ and choose your dedicated conversion landing page.
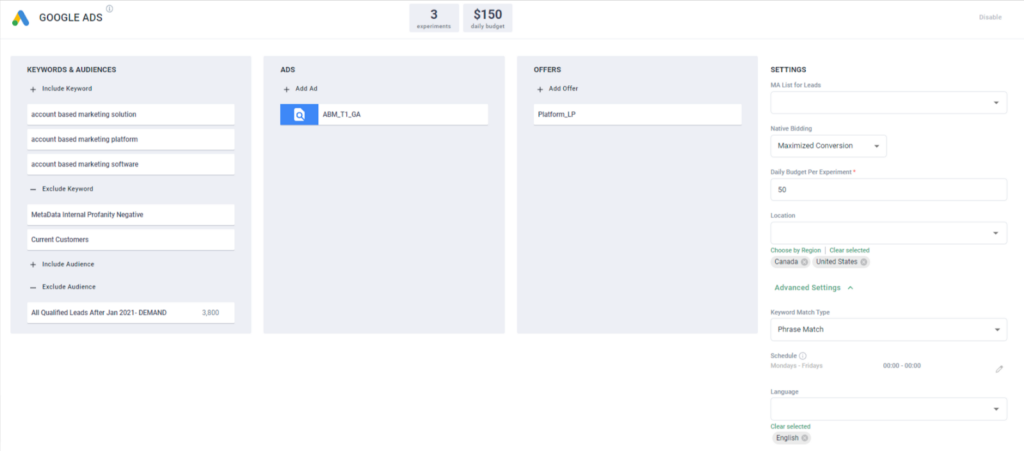
Campaign Settings
- MA List for Leads = 100% optional
- Native Bidding = recommend Maximize Conversions to start (can adjust post launch)
- Daily Budget Per Experiment = $25-$50/day per experiment
- Location = your target location (example = United States/Canada)
- Keyword Match Type = recommend Phrase or Exact
- Schedule = recommend Monday – Friday (can adjust post launch if needed)
- Language = recommend one language per campaign (example = English)
Once you’ve finalized your settings and campaign ingredients, launch your campaign!
P.S: If you want to test your multiple match types just duplicate your original campaign and make those adjustments.


